BLOGGER TEMPLATES AND TWITTER BACKGROUNDS

Friday, August 12, 2011

Golden Goddess Look

"When you reach the heart of life you shall find beauty in all things, even in the eyes that are blind to beauty." ~Kahlil Gibran


By now I think we all know that one of the summers biggest trends is the bronze golden look. It is fun, subtle, and flatters any skin tone. There are many variations on how to create your own golden look and I finally decided to go for it and do my take on it and here it is!


I know the lighting sucks but you can still see what my finished product is. It is very simple to create this look and it can be done using gold and brown eyeshadows you already have or spending less than $10 to buy a quad that is nothing but gold and brown colors. It is a perfect look for a night out with friends, a date night, or just for work. If you want to learn how I did this look and what I used keep on reading :)

PRODUCTS USED:

FACE:
*Laura Mercier Oil free Face Primer (Sephora)
*Benefit Cosmetics The POREfessional Primer (Sephora or Ulta)
*MAC Studio Sculpt Concealer (MAC)
*Lancome EFFACERNES Waterproof Protective Under Eye Concealer in Medium Bisque (Sephora)
*MAC Mineralize Skinfinish Natural (MAC)
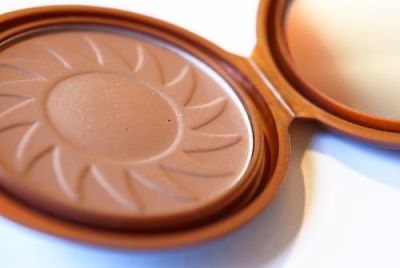
*Laura Mercier Bronzing Pressed Powder in Golden Bronze (Sephora)
*e.l.f. Mineral Blush in Rose (e.l.f. and local Target)
*e.l.f. High Definition Powder (e.l.f. and local Target)

EYES:
*Urban Decay Primer Potion (Sephora or Ulta)
*Almay Intense I-Color Powder Shadow Trio for Brown Eyes (Ulta or any drugstores)
*Cover Girl Eye Inhancers 3 Kit Shadows in Golden Sunset (Ulta or any drugstores)
*Flirt! Cosmetics Dream Eyes Eyeshadow in Solid Gold (Flirt! Cosmetics or Kohls)
*MUFE Aqua Liner in #7 (Sephora)
*Urban Decay 24/7 Glide-On Eye Pencil in Zero (Sephora or Ulta)
*Benefit Cosmetics Browzing in Dark Brown (Sephora or Ulta)
*MAC Zoom Fast Black Lash (MAC)

LIPS:
*MAC Lustre Lipstick in Sweetie (MAC)
*e.l.f. Luscious Liquid Lipstick in Baby Lips (e.l.f. & Local Target)

HOW TO ACHIEVE THE LOOK:
Once you have put on your foundation, bronzer, and blush apply your eye primer. I used the Urban Decay Primer Potion.
Next use the first (and lightest) color in the Almay Color Trio and apply over the entire eye. This works as your highlight and base color. 
Next we are going to use Flirt! Cosmetics eyeshadow in Solid Gold. Using the sponge tip applicator provided with it or a small eyeshadow brush apply this color over the eyelid. I only like to use the sponge tip applicators when I want to pack on a color and this is defiantly one you want to pack on.
Now using the Cover Girl trio in Golden Sunset use the dark brown color for the crease. This color is not a very pigmented or strong color so you may want to go over it more than once. 

It should look a little like the picture above. Now because I wanted to add some color I went in with my MUFE Aqua Liner in #7. #7 is a very deep violet color with shimmer. Perfect for summer time and the added bonus is its waterproof! I also lined my water line with Urban Decay 24/7 Liner in Zero, this is of course optional. Finally I put on mascara.
Excuse the messy hair (this was taken before I flat ironed my hair (was waiting for it to completely air dry)).This is the end result. I hope you guys like this look. Like I mentioned before it is very simple but also a versatile look. 


**Coming Next will be an Ulta Cosmetics Haul and review...maybe some different looks using the products.


Haul Time!

"The difference between pretty and beautiful is-pretty is temporal-whereas beautiful is eternal." ~ Unknown


So recently I decided to try some new products that are very inexpensive and are amazing! I went to my local Target for e.l.f products and Sally Beauty Supply for Palladio products. I apologize beforehand for the horrible quality of the pictures since I took them last night and my lighting totally sucked. Once again prices and links to where you can purchase these products will be listed at the very end. So lets get started! 


So in the picture above is all the things I bought. I believe all this was for under $35 dollars which is a pretty great deal since most of my makeup is $30 and up for a single item. So from left to right starting at the very top I have the Palladio Natural Rice Powder in translucent & the Palladio Herbal Eyeliner Pencil in White. Next is the Palladio Eye Ink in black, Aveeno Essential Moisture Lip Conditioner with SPF 15, e.l.f. Lipstick in Classy, 4 e.l.f. Luscious Liquid Lipstick in Baby Lips, Pink Lemonade, Maple Sugar, and Ruby Slippers. Finally 2 Palladio Herbal Tinted Lip Balm in Golden Pink and Cotton Candy. So now lets get into what I think. I have only tried these items once or twice so if need be I can keep you posted on how I feel about these products after I have used them for a while. 

First lets talk about the Palladio Products!

Lets start with the 2 Herbal Tinted Lip Balms I have. Like I mentioned before the colors I purchased are Cotton Candy and Golden Pink.

 I was honestly impressed with these two tinted lip balms, well, one more than the other. Golden Pink is such a beautiful color that gives my lips a nice tinted pink color with gold shimmers. Totally love it! Cotton Candy was very very shear I was only able to see the shimmers and nothing else. Cotton Candy I would recommend to people with fair skin or anyone that wants a nice shimmer to their lips. Over all I did like the feel of the lip balms. It went on so easily and made my lips feel super soft. The packaging was okay, nothing too flashy. Finally they have a very subtle smell and its a very pleasant smell too. 

Next the Palladio Eye Ink in Black. This liquid eyeliner is just amazing and completely affordable! It has a felt tip which is great for precision work and for people just starting to get into liquid eyeliners. 
 I was very impressed with how dark the eyeliner is and how quickly it dried. I actually have this eyeliner on today and I love it! Even my husband mentioned how well the color pay off was. I am looking forward to trying the other colors they have available and see how those work.


The Palladio Herbal Eyeliner Pencil in white is something I purchased because I have no white eyeliner. In case you don't have one you should totally purchase one! White eyeliner is perfect for applying in the inner corner of the eye to give the eyes a little bit of a pop and also on the water line to help whiten the eyes and give them a pop at the same time. It makes them appear bigger and make you look wide awake. I tried the eyeliner on and it does go on very smooth and is white. I will have to try it on for the whole day and let you know who it works but so far it is okay. 


Finally the Palladio Natural Rice Powder in translucent. This is the main product I have been wanting to try for quite a while. I have heard and seen many great reviews on this product and it totally impressed me! It is an amazing setting powder that leave my skin looking matte and not cakey at all. I have not had a problem with it at all. I have noticed it helps control my oily areas and stays on all day long and my face looks amazing. I have heard people say its messy or makes their face cakey but not for me. They may just be using too much product. I totally recommend this product for combination and oily skin. It is simply amazing!


Next onto the e.l.f products! I want to start with the most amazing lipstick I have found for only $1! 

This lipstick is from their Essential Line, in which every product is only $1! I must say the quality of this lipstick is just amazing. The color I purchased is Classy, which is a soft classic pink that is perfect for any skin type. I actually was influenced to purchase this lipstick by EmilyNoel83 (Click Here to see her video). She was doing a video of her favorite M.A.C. Lipsticks and their dupes. This particular lipstick in her video is a dupe for M.A.C. Angel. 
Any who, since I don't own any pink lipsticks I decided to give this one a try since it was only $1 and I LOVE IT! It is so creamy and goes on easily. It has a pleasant smell but it doesn't last all day long. I don't mind reapplying though because of its creamy texture. 

Now onto the e.l.f. Luscious Liquid Lipstick. These are also from the Essential Line. 
The four colors I purchased are Baby Lips, Pink Lemonade, Maple Sugar, and Ruby Slippers. These are simply amazing for their very inexpensive price. They are not sticky at all and give a beautiful shine to the lips. These that I purchased have some good pigmentation on them. They last quite a while on and smell minty! 

This a picture of the swatches I did of the four colors and I love them. They look even better on the lips. Baby Lips and Pink Lemonade give me a subtle hint of pink, nothing too exaggerated. Maple Sugar only gives my lip a nice shine, the color is very subtle. Ruby Slipper is beautiful and would look amazing on top of a red lipstick. Over all great product for an amazing price. 


Finally my Aveeno Essential Moisture Lip Conditioner with SPF 15. I purchased this item because that day I left my house without a lip balm and my lips felt super dry and needed some TLC. 


This lip balm is super amazing! It smells like vanilla to me and makes my lips feel super soft and moisturized. I feel no need to reapply constantly, which is pretty amazing! The SPF is just a huge plus. I have actually started applying this before I apply my lipstick so that my lips don't look dry and flaky. It also makes my lipstick last longer then usual. First I exfoliate my lips with my C.O. Bigelow Mentha Lip Buffer. Once my lips are dry and clear of the buffer I apply this lip balm. I then take a tissue and blot my lips, it may seem pointless but I do this so my lips are moisturized and dry not oily. Finally apply your lipstick. It works wonders for me! 


Well I hope this haul helps and maybe makes you want to go out there and try some new products. Talk to you guys soon :D


Price List:
*Palladio Herbal Tinted Lip Balm: $3.99 each (8 colors available) (Sally Beauty Supply)
*Palladio Eye Ink: $5.99 (6 colors available) (Sally Beauty Supply)
*Palladio Herbal Eyeliner Pencil: $2.99 (9 colors available) (Sally Beauty Supply)
*Palladio Natural Rice Powder: $4.99 (available in Natural,Warm Beige,& Translucent) (Sally Beauty Supply)
*e.l.f. Lipstick: $1.00 (7 colors available) (eyeslipsface.com or a local Target)
*e.l.f. Luscious Liquid Lipstick: $1.00 ( 11 colors available) (eyeslipsface.com or local Target)
*Aveeno Lip Nourishment with SPF 15: $2.79 (aveeno.com or any drug store)


Sunday, August 7, 2011

Road Trip/Vacation Makeup Must Haves!!!


“It is better to be beautiful than to be good, but it is better to be good than to be ugly.”~Oscar Wilde


Its summer time and everyone knows what summer time is...ROAD TRIPS AND VACATIONS! They are super fun to plan but how do you go about packing your makeup?  Do you carry full size products or travel size minis? Well I myself was planning and packing for my road trip and came across the same question. So after a lot of research and thinking (yes thinking, have to think about what all you need and what not) I came up with this list of makeup road trip/vacation must haves! 

STEP ONE: Location, Location, and Climate
Yes, step one. This step is determining where you are going on your road trip or vacation. Once you figure out where you will be traveling you want to determine the climate. Nothing is worse than taking your new favorite lipstick on your trip to  Phoenix, AZ and discovering you lipstick melted due to the extreme heat. So location and climate due play a big part in your makeup packing.

STEP TWO: Storage Space
How much space for makeup will you have? Ideally for a road trip or vacation try to keep it all in a single makeup bag, unless you are going to a resort or something. Then a train  case would be a good idea...maybe.

The Urban Decay Quinceañera Bag is a good sized bag to fit your makeup. This bag is a bit pricey but there are others out there this size but for almost half the price. Try Sephora, Ulta, or even Wal*Mart.

STEP THREE: BRUSHES OR NO BRUSHES, THAT IS THE QUESTION.
Determining if you want to take your brushes on the trip or not is a difficult question to answer. If you are going to be doing simple makeup application or no makeup at all just some tinted moisturizer than brushes are not needed. Think about the locations you may visit on this road trip or vacation. Concerts, dances, fancy dinners? Or just camping, hiking, and exploring? Depending on this you will determine on yes to brushes or no. Maybe just sponge tip applicators. So think this through...

Now onto what you must have on you for this trip! 

1. Sunblock -I put this as the number one thing because it is summer and summer means being in the sun and you do not want to burn! Finding a good sunblock with good SPF is key. I prefer using Aveeno Continuous Protection Sunblock for Face in SPF 30. It is specifically designed for the face. Leave your face protected and doesn't leave it greasy at all. This product does go up to 
For the rest of my body I like to use Coppertone Ultra Guard Sunscreen with SPF 30 as well. You can use something higher if you would like.

Along the same lines as sunblock you also need some for your lips. Nothing is worse than having sunburnt lips. A good chapstick or lip balm with spf 15 is ideal. I have been using Neosporin Lip Health Daily Hydration Therapy.
Not only does it hydrate your lips but it also has and SPF 20. This is one of my new favorite lip balms. Its also perfect for hot climates because its already melted in a tube. Works wonders!

2. Moisturizer- Although this may just be a relaxing trip you do have to take care of your skin. For moisturizer I took along Aveeno Clear Complexion Daily Moisturizer. This product can be used as a day and night time moisturizer. For day just apply the face sunblock before the moisturizer.

3. Facial Cleansing Wipes- Nothing is more disgusting than the feeling of sweaty oily skin and if you have makeup on its even worse. Investing in a travel size of facial cleansing wipes is a good idea. I recommend Neutrogena  Makeup Remover Cleansing Towelettes. They work as a facial cleanser and makeup remover. Makes any makeup remover liquid as one less item you have to pack and carry.
(If you want to read my review on this product click here.)

3. Toner- I had to throw toner in here because you want to still take care of your skin. A lot of different brands actually make travel sized toners. Since I didnt want to spend a lot of money on a travel size item I went to my local Wal*Mart and purchased a small spray bottle from their travel/mini section. I just filled it half way with my favorite toner, Origins United State. 
I actually did a mini review on this product in another post (click here!). Like I said in my previous post I love this product. Perfect for combination skin! 

4. MAKEUP! - Now this is where you decided what to take and what not to take. For my roadtrip I packed the following:
*Primer- I am a huge fan of primer so I did pack my all time favorite primer, The Porefessional!
 It is really up to you if you want to take a primer. If you are going to a concert in say, i don't know, Phoenix, and want to get all dolled up for it then primer is a must!
*Foundation- I decided to pack the Josie Maran Argan Matchmaker Serum Foundation. 

This product is just amazing! (I will do a review on it soon!) It comes in 3 different color combinations. It blends right into your skin so you don't need to fuss over any color matching. However it is on the pricey side. So if you are not wanting to spend so much you can pack your own foundation or maybe a tinted moisturizer. 
*Bronzer/Blush- I was wanting to go for the nice summer tan look, so I took 2 bronzers with me. I took the NYC Bronzer in Sunny. 


This is a matte bronzer that looks great on any skin color. The other one I took with me was the E.L.F. Contouring Blush and Bronzing Powder. 


The reason why I took 2 bronzers is because Sunny is a matte bronzer, perfect for contouring and giving you a very natural tan look. Now the E.L.F. was a two in one. It works as a blush (subtle shimmer) and the bronzer is perfect for contouring and has again a subtle shimmer. 
*Eyeliner- I actually took only 2 eyeliners and both were liquid. Since, once again, I was going to a very hot place I wanted something that wouldn't melt, like a regular pencil or gel would. I recommend taking two colors. Your basic everyday color, which for me is black, and a nice metallic color. Metallic colors are perfect for the summer since they give you a fun look. I took the Palladio Eye Ink in Black.
This is a very inexpensive but great liquid liner. It is small so its perfect for travel. The other eyeliner I took was the MUFE Aqua Liner in #7 (Diamond Black Purple). 

Added bonus to this liquid liner is that it is waterproof. So I could wear this swimming or in 100 degree weather. A great waterproof liner for about half the price is Milani Infinite Liquid Liner, which are also waterproof (review on these to come soon as well :)).
*Mascara- Mascara is a must! So for mascara I took my waterproof L'Oreal Voluminous.

This mascara is great for lengthening and giving fuller lashes. It is one of my favorites!!!
*Eyeshadows: Now this is a step that is up to you. If you want to take eyeshadows you can. I feel that small palettes work best for traveling. A good example of a great, inexpensive, and small eyeshadows is E.L.F. Brightening Eye Color in Day 2 Night.
This quad is small and so inexpensive. Its perfect for creating both day and night looks, hence the name of it.
*Lipstick/Lip Gloss/ Liquid Lipstick- This is also something that is totally up to you and depends on the weather. Like I mentioned before nothing is worse than finding your favorite lipstick melted from the extreme heat. So besides accidentally taking my Laura Mercier lipstick I brought along my E.L.F. Luscious Liquid Lipstick in 2 tones: Baby Lips (a soft subtle pink) and Ruby Slippers ( a nice deep red).
These work perfect for very hot climates because they are just like a lip gloss expect more pigmented. Nice thing about them is they have a mint smell. Makes your lips tingle.
*Brushes/Tools/Applicators- Like I had mentioned before it is completely up to you if you want to take any of these and well for me, I had to take my brushes. I actually took my MAC Travel Sized brushes that my husband got for me Christmas '09. They do come handy! 
*Setting Spray/Powder-I actually took my MAC Fix+ Spray with me for my setting spray. 
It was very handy and refreshing to use. Urban Decay makes a travel sized setting spray and if I remember correctly MAC does too. Now for my setting powder (which helps control oily spots) I took my travel size HD Microfinish Powder from MUFE. 
This setting powder works wonders and is very small it does not take up much space. However it is very pricey for the amount of product you get so for a less expensive alternative E.L.F also has a HD Setting Powder less than half the price of MUFE. It is quite bigger but works just as great and you get a lot more bang for your buck! 

Now you must be wondering if you should pack full sized products or not. Depending on how long your trip is you can actually place all the item (except eyeliner, mascara, eyeshadow, and sunblock) in travel size bottles or jars. Like I mentioned before I packed my Fix + spray and toner in a travel sized spray bottle.
They are inexpensive, small, and compact. You dont have to fill the bottle all the way up. Just enough for the length of your trip.
For the foundation and moisturizers I used a little jar. 
You can either purchase these or even the sample jars that MAC and Sephora give out will work too. Like I said it all depends on the length of your trip how much you need and if its even necessary to take the full sized product. You can also go out and purchase all the products in travel size if you would like, but if it were me, I would rather spend as little as possible and save that money for the trip.

I hope this helped a lot of you! If there is anything you would like to know more about or reviews on anything just let me know. Take care and have a fun and safe trip!!! :)


PRICE LIST:
*Urban Decay Quinceañera Bag: $26 (Sephora or Urban Decay)
*Aveeno Continuous Protection Sunblock for Face SPF 30: $8-$10 (Local Drugstore)
*Coopertone ultraGuard Lotion SPF 30: $7-$8 (Local Drugstore)
*Neosporin Lip Health SPF 20: $4-$5 (local Drugstore)
*Aveeno Clear Complexion Daily Moisturizer: about $13 (local drugstore)
*Neutorgena Makeup Remover Facial Towelettes: $4-$7 (local drugstore)
*Origins United State Balancing Tonic: $19.50 (Origins)
*Benefit Cosmetics The POREfessional: $29 (Sephora or Ulta
*Josie Maran Argan Matchmaker Serum Foundation in Light/Medium: $42 (Sephora)
*NYC Smooth Skin Bronzing Powder in Sunny: $1.50-$2.99 (Local Drugstore)
*E.L.F. Contouring Blush and Bronzing Powder: $3 (E.L.F. or Target)
*Palladio Eye Ink in Black: $5.99 (Sally Beauty Supply or Ulta)
*MUFE Aqua Liner in #7: $23 (Sephora)
*L'Oreal Voluminous Waterproof Mascara in Black: $4-$6.99 (Ulta or your local drugstore)
*E.L.F. Brightening Eye Color in Day 2 Night- $1.00 (E.L.F. or Target)
*E.L.F Luscious Liquid Lipstick in Ruby Slippers & Baby Lips: $1.00 (E.L.F. or Target)
*MAC Fix+ Spray: Travel size-$10; full size: $20.00 (MAC)
*Travel Size Spray Bottles & Jars: $1.00 ( Local Drugstore)


Wednesday, May 25, 2011

Super Mario One UP Nails!

"Imperfection is beauty, madness is genius and it's better to be absolutely ridiculous than absolutely boring."  ~Marilyn Monroe


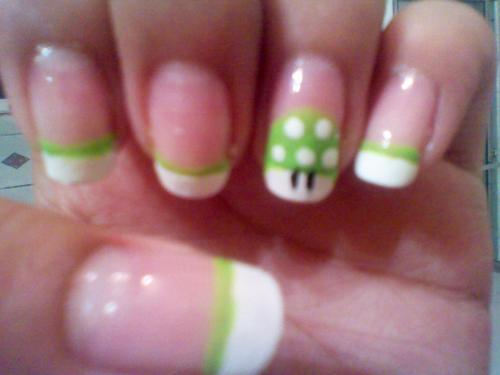
So lately I have been super obsessed with Super Mario! I don't know why but I love that game so much I actually went out and bought a Nintendo (the original one. For those wondering why...well we own a X Box 360 and unfortunately they do not make Mario games for it...yet!).  Not to mention it was a steal because it was only $40 with all the cables, 2 controllers, the Super Mario game with Duck Hunt and of course the gun! Any who I decided that to match my passion for this awesome game and my ringtone, notification ringtone, cell wallpaper, and the "Nintendo Addict" T-shirt my husband bought me I would do something  similar for my nails! 
So here is the finished result! It took quite a bit of practice but the final result was amazing and they look super cute! Totally matching my Super Mario passion.  So lets get started on the supplies you need and how to achieve this simple and cute Mario nail look :) (as usual purchase location and prices  for the products I used will be posted at the end)

Supplies Needed:
  • Dotting tool(it can be a toothpick, bobby pin, or actual dotting tool)
  • Base Coat
  • White nail polish
  • Black nail polish
  • Green nail polish
  • Top Coat
  • If you do not have the black and green in the art pens or art polishes(the skinny tubes with super skinny brush) you may need a skinny art brush or a toothpick
  • Tape
  • Piece or cardboard or card stock (to put polish on so you can dip your dotting tool in)
Instructions:
First make sure your nails are squared off. This look works best on squared nails, but if you do not want to its ok, it will still work. For the first step you should appy a base coat. A base coat helps the nail polish adhere better, last longer, and keeps your nail from turning yellow. I personally like to use Sally Hansen Nailgrowth Miracle. I have used this since I was 16 and love how it keeps my nails strong and helps them grow a bit faster. Base coats tend to dry fast. I believe this one dries within seconds so its a good thing.

Once you have applied the base coat to your nails grab the tape and make 2 to 3 tape strips. The tape is going to allow you to make a nice sharp straight line for the french tip. You dont need 10 strips of tape since it is reusable and will it will save you tape too. I believe I used 1 piece of tape for 3 nails and it still would have worked for 3 more.

Once you put the tape on go in with the white fingernail polish and fill in the tip. I am using Sally Hansen, Hard as Nails French White Tip polish (this came in a 3 piece kit for french manicures).
Let it dry for a while and remove the tape carefully. You may need to free hand and fill in the corners or even out the line (I suck at straight lines with anything, yet I can cut straight lines in hair...its kind of funny!).

Repeat this step on every single nail. If needed take a q-tip and dip it in some nail polish remover and clean up the straight line.

Next step is for all the nails EXCEPT the ring finger on both hands. Using the green polish remover to create a straight thin line right underneath the end of the white tip. I used Kiss Nail Art Paint. If you do not have this but do have a green polish use the tip of a toothpick or a bobbypin to make this line. Just put a dot of product on the cardboard or card stock and dip your toothpick or bobbypin in and make the line. The final result should look like the picture at the very top of this post. For some reason my computer did not like the picture and wouldnt upload it...lol.

Now onto making the One Up Mushroom. For this you will once again use the green nail polish. Starting at the left side of where the white tip ends start making a half oval.
It should look like the picture above. Next step is to fill it in with the green polish. You also want to curve it on a little on the white part like shown in the picture below.

Now using the cardstock and the white polish again we are going to place a dot of product on it.                                                 
Using the bobbypin (or whatever dotting tool you are using) dip it in the white polish and make 5 dots in the green half oval. One should be in the center close to the base. The following two are placed to the left and to the right of the initial center dot. The next two are right above the first row of dots but in between the dots. Use the picture below for referance.


We are almost done! Now taking the black polish we are going to make 2 eyes right next to the green and centered. I am using Kiss Nail Art Paint. Your results should look like the following picture.
The final step is to apply a top coat to the nail so it protects your nail art. I used Sally Hansen, Hard as Nails UV Top Coat.

Finally done! The nails should look super cute and fun! It may take a little bit of pratice but the final result is amazing! I hope you guys enjoy this nail art!!!


Price List:
*Kiss Nail Art Paint (it is a pack with 3 different colors) $6.97 (drugstore)
*Sally Hansen Manicure Kit (the kit comes with a white polish, a pink, and uv top coat that was used too) $5.48 (drugstore
*Sally Hansen Nailgrowth-about $5-$6 (drugstore)

Monday, May 9, 2011

Drug Store Dupes!

So while on Tumblr ( which you can follow me at by clicking here :)) I found a link that shares a lot of dupes for high end brands. I thought this was pretty cool and I want to share it with you guys. It is a super long list and is prety amazing. Enjoy :D 

My Daily Skin Care Routine!


So I am really starting to get back into this whole blogging thing that today I decided to do a blog of product that I use on a daily basis for my skin. I am super excited to share this! I guess I should start by telling you a little bit about my skin. My skin is nowhere near being perfect or where I want it to be. I have combination skin that is acne prone. I really really dislike it! However I cannot change my skin but I can take care of it to make it appear and be in a lot better condition. So lets get started! (P.S. Prices and locations where you can find these products will be a the very bottom of the page.)

MORNING:
Every morning I wash my face. Whether it is in the shower or if I showered the night before I simply wash it. For my face wash I am currently using Cliniques Liquid Facial Soap in mild. Remember, Clinique has a skin line designed for different skin types. The mild formulation is perfect for combination skin. 
 
I must say that I really enjoy this liquid soap. It leaves my skin feeling super soft and not oily or dry at all. It has a very pleasant smell so you dont have to worry about that.  I do use this in combination of my Clarisonic.  
  
I know that the Clarisonic is expensive but a great dupe for it is the Olay Professional Pro X Advanced Cleaning System.

                                             
They both works just amazing! This product in combination with my Clinique face wash help get deep down in my pores and remove any traces left from my makeup and cleanse my face. I have seen some of the reviews from people saying that it made them break out and what not but you must remember that in order to keep your face healthy it must get worse at first. The breaking out is caused from all the bacteria and debris getting taken out of your pores. So dont freak out!  I usually use the Clarisonic in the morning and at night for a full 1 minutes 20 seconds.It is waterproof so I do use it in the shower to cleanse my face, so its very convenient. I make sure to focus on my problem areas such as my nose and cheeks and I also use it on my neck. 

Next I apply a toner to my face to help close the pores and remove any other debris left behind. For this I am truly enjoying my Origins Balancing Tonic in United State. 
                                                       
This 5 fl oz bottle has lasted me for almost 3 months! You do not need to drench a cotton ball or a cotton round with the product, because trust me, a little of this goes a long way. Make sure to apply it all over your face. Let it dry for a good 3 to 5 minutes. This toner is designed for combination skin and is super gentle. It doesn't sting or strip your skin and it smooths out and rough skin. It smells amazing! It has spearmint and lavender as well as bergamot. 

Next step is moisturizing and eye treatment! Now I am only 21 and have started using anti-aging product because I made a bet with my mom that I would be 50 and look young and fabulous. Plus its never too early to start thinking about using anti-aging products. For my eyes I have been using Boscia Enlivening Amino-AG Eye Treatment.


 This eye treatment is designed to hydrate the skin from the inside so it can improve and prevent the signs of aging. A few key ingredients this product has is Coix seed & vitamin E (which together help reduce puffiness and diminish dark circles), willowherb helps accelerate cell renewal and smooth the appearance of fine lines. The biggest plus is that this product is a natural product made without parabens, sulfates, synthetic fragrance, synthetic dyes, phthalates, GMOs, and triclosan. Apply a small amount (usually half a pump or a full pump for both eyes) around your eye with your ring finger. Gently pat it in. I have been using this for almost 4 months and it is very hydrating and feels amazing and cooling under the eye. I have noticed dark circles look a lot fainter and my eye puffiness, due to hardly getting sleep and stress, less noticeable. This product is perfect for all skin types.By the way, is my first bottle purchased and its only .5 oz, so a little of this baby goes a long way!

For my moisturizer I use another anti-aging product. I am so going to win my mother in this bet :D. I use Bliss The Youth As We Know It Anti-Aging Moisturize Cream. 
I love love love this moisturizing cream! It is super hydrating and doesn't leave the skin feeling oily, sticky, or super shiny. I feel it does a very good job at keeping my skin super moisturized and looking healthy. It is more on the price side but I think it is worth every cent. It is made without synthetic dyes, petrochemicals, phthalates, and triclosan. Like I said before I love this product and it will work well for many skin types, although I am not too sure about oily skin since this is a very very hydrating product. I let my moisturizer penetrate my skin for 30 minutes and then proceed to my daily foundation routine. ( I have already done a blog for my daily foundation routine.)

NIGHT:
Now my daily night routine involves removing my makeup and cleansing my face. To remove my eye makeup I am currently using Sephora Collection Instant Eye Makeup Remover. 
This product works great and make it super easy to remove any tough makeup. If you use waterproof Sephora Collection also has a eye makeup remover for waterproof makeup that works well too. It does leave the skin feeling soft but often I feel like it makes my eyes feel all oily and super shiny. So if you guys have suggestions on a eye makeup remover that doesn't leave them feeling oily let me know. I want to try something new! Overall it does work well. 

To remove the rest of my face makeup I like to use Neutorgena Makeup Remover Wipes.


These wipes are super gentle and remove makeup with ease. It has a very pleasant clean and fresh scent to it and they are super soft. My husband even uses these to clean his face whenever he works on the cars and gets oils spots on him. I love love love these wipes! I would recommend these to everyone and they do work on all skin types. 

Once my make up is completely removed I go into the morning skin care routine and head to bed. I hope this helps a little on how to start your own routine and what products that I have tried I have stuck to because of how good they work and of course the ones that I am not a big fan of. I will be trying new products and will works on finding great dupes for some of these or alternatives and will post those soon too. Stay happy and gorgeous :)!

Price List:
*Clinique Face Wash: $16 (Sephora)
*Clarisonic in  Classic: $149-$225 (Sephora or Clarisonic)
*Olay Professional Pro X Advanced Cleaning System: $29.99 or $39.99 depending on just purchasing the brush itself or with the cleanser. (Costco & Drug Stores)
*Origins Balancing Tonic in United State: $19.50 (Origins & Macys)
*Boscia Enlivening Amino-AG Eye Treatment: $38 (Sephora)
*Bliss The Youth As We Know It Anti-Aging Moisturizer: $79 (Sephora)
*Sephora Collection Instant Eye Makeup Remover: $5-$8.50 depends on size you want (Sephora)
*Neutorgena Makeup Remover Wipes: $5-$7, although I got mine at Costco, 114 towelettes for around $16-$20 and it was so worth it! (Drug Stores or Costco)