BLOGGER TEMPLATES AND TWITTER BACKGROUNDS

Wednesday, November 23, 2011

Updated Foundation Routine for Fall/Winter

"Zest is the secret of all beauty. There is no beauty that is attractive without zest."~Christian Dior


So its almost Thanksgiving and I thought it would be the perfect time for me to do a updated foundation routine. As all of you know the temperatures are dropping and our skin is losing most of its moisture. In my case, dry patches start to be a lot more noticeable. So during this time of the year I try to change up my foundation routine and skin care routine as much as possible to help keep my skin looking fresh and moisturized.

STEP ONE:
Moisturizer. You want to moisturize your skin 30 minutes before applying any type of primer to your face. This allows your skin more time to absorb the moisturizer. My current moisturizer is Origins, VitaZing SPF 15.

I love this moisturizer for various reasons. Its is an organic product that is formulated without any parabens, phthalates, mineral oil, and various other products. Not only does it moisturize my skin but it also has a sheer tint, a little more sheer than a tinted moisturizer, and it helps me look awake. The SPF is like the cherry on top. It has a scent to it that is not over powering. The scent kind of reminds me of mangoes. It smells delicious but like I mentioned before, not overpowering at all. For this a dime size or less is perfect to apply to the entire face and neck. This is good news since this product is a little pricey ($35) for the amount you receive (1.7oz). So keep in mind a little bit of this goes a long way.

STEP TWO:
Primer. Face primer is a must for everyone. A primer helps the product adhere better to the skin and it helps you use less product. Some primers brighten up colors or minimize pores. My all time favorite primer is Benefit Cosmetics, The POREfessional.

This primer is a quick fix primer. By quick fix I mean you see immediate results versus seeing the results over time. This quick fix primer helps minimize pores. I love this because I do notice the difference immediately and I do have large pores on my cheeks and nose. I apply the product in my problem areas and for the rest of my face use a different primer. You do not need to use much of this product. I recommend using this only on the problem area and using a different primer on the rest of your face. If you find this to be too much of a hassle a pea sized amount of this will cover your entire face.  It is a primer that is a little on the pricey side. It retails for $29 and its a .75oz bottle. I will say that like my moisturizer a little of this goes a long way. I had one bottle of this primer for a year before I had to repurchase a new one.

The second primer I use is Laura Mercier Foundation Primer in the Oil Free formula.

This I apply to my forehead, chin, and upper lip. I use the oil free formula because it does help control my oily skin a lot better. Once again another primer that is on the pricier side. This is $30 for a 1.75oz bottle. A good dupe for this that I have found is the Palladio Herbal Foundation Primer.

 It leaves my skin with that silky smooth finish, it is not too greasy feeling but does hydrate at the same time, and it is less than half the price ($11.99 for 1oz) of the Laura Mercier. My skin seems to be very weird I tell you. I have dry patch areas and I have oily areas. If only they would combine an give me normal skin I would be happy. A girl can dream :)

STEP THREE:
Foundation and concealer. Now this would not be an updated foundation routine if I did not change up something, right? For this cold season you want to have a more dewy foundation, specially is you have dry skin or dry patches. Matte foundations may give you a more dull flat look and if you have dry skin it make look like you have very unhealthy flaky skin. I have two foundations that I alternate with, depending on how much coverage I want. The first foundation is the Josie Maran Argan Matchmaker Serum Foundation. My color is in Light/Medium. 

There are 3 shades to pick from and the reason for that is the true skin matching technology. This is an amazing product! You apply this to your skin and start blending it in and you see it start matching your skin. It is amazing to see this in person. I feel like this foundation hydrates the dry patches and does not overly hydrate the rest of my skin. I would say this is the perfect foundation for any skin type since it knows where to hydrate the most. This is another organic product, GO GREEN! Some of the pros of this foundation are that it is paraben free, cruelty free, vegan, toxin free, and recyclable. This does have a slight scent. I cant quite describe it but it smells clean to me. This foundation does give me a dewy finish but it is not full coverage. I would say this is more of a medium coverage foundation but I don't mind this one bit. As for usage, one pump is more than enough since the product does spread out easily and evenly. This retails for $42 for a 1oz bottle. The price may be very steep for some, but the quality of the product is well worth it and the packaging is perfect as well.

The second foundation I like using is the Neutrogena Healthy Skin Foundation. My color in this is Natural Tan.
Maran, $12.49 for 1 oz,but this foundation is also buildable to full coverage and still not look cakey. It does go on fairly easy and I do find it hydrating. I would say this is a great inexpensive foundation for this season.

I like to apply my concealer after I apply my foundation. Sometimes foundations will take care of the problem areas of the skin so concealer would be pointless then, but other times you do need to apply that little bit to that pimple or to the dark under eye circles. For concealer for this season I like using my Amazing Cosmetics, Amazing Concealer in Tan.
This is a very pigmented and concentrated concealer. I love this for blemishes and dark under eye circles. It is a liquid form so that does help it glide on a lot easier. You seriously only need to use a pin sized amount to get the perfect amount of coverage for your blemishes or dark under eye circles. This concealer is paraben free which is great. It is very pricey though. I have the travel size, which is .2oz, and I paid $28 for it. The full size is .5 oz and its $42. It does last a very long time but it is very very pricey. I highly recommend it though. 

Usually my next step would be to apply a setting powder over my foundation, but not in this case. If you have super oily skin you can apply a very light amount of powder only to the oily areas, otherwise too much powder will matte up the finish and the dewy look will be useless. So for this season I would recommend to skip it. We don't want our skin too look flat and flaky. Next you would go onto finishing the full face look with lips, cheeks, and eyes. 

This is a very simple and quick way of having a nice dewy finish to your skin and help your skin not look dull at all during this holiday season. I hope you guys enjoyed this mini update. I hope to be doing posts more often as well. Does your foundation routine change during the colder season? If so, what foundation do you use?

PRICE LIST:
*Origins, VitaZing SPF15: $35 (Sephora & Origins)
*Benefit Cosmetics, The POREfessional: $29 (Sephora & Ulta)
*Laura Mercier Foundation Primer, Oil Free: $30 (Sephora)
*Palladio, Herbal Liquid Foundation Primer: $11.99 (Ulta o& Sally Beauty Supply)
*Josie Maran Argan Matchmaker Foundation Serum: $42 (Sephora)
*Neutrogena, Healthy Skin Liquid Makeup: $11.99 (Ulta & most drugstores)
*Amazing Cosmetics, Amazing Concealer: $28-$42 (Sephora and Ulta)


HAPPY HOLIDAYS EVERYONE!!!

Monday, November 7, 2011

Best Brush Cleaner Ever!!!

"There is no cosmetic for beauty like happiness." ~Maria Mitchell


So for all of you makeup artist out there or aspiring makeup artist you know that the most important thing that we all own, besides our cosmetics, is our tools. Our tools help us achieve the looks we want with little to no effort and hassle at all. Now like any other thing we own, our brushes need to be properly cared for. By this I mean daily cleaning and monthly deep cleaning. This may seem to some like a big hassle, but when you love what you do and want your brushes to last a lot longer it doesn't seem like a big deal anymore.

So while watching some videos on YouTube I came across a video by dulcecandy87. For those of you who do not know her, click here to see her YouTube channel. So she has a video where she is doing a review on the Sigma Dry n' Shape and she mentioned Dr. Bronner's Magic Soap. I was amazed at how big the bottle was but most of all how little amount of product it took to clean 12 brushes. Needless to say I went to my local Target and found Dr. Bronner's Magic Soap in different scents and two different sizes.

Now lets talk a little bit about the scents and the sizes they have. There are 8 different scents to choose from. Pretty much a scent for everyone out there. The scents are Peppermint, Eucalyptus, Almond, Rose, Baby Mild, Citrus, Lavender, and Tea Tree Liquid Soap. I personally didn't care much for the others so I got the lavender. Also lavender is known to help you relax. So what better way to help be relaxed and stay relaxed then getting whiffs of lavender when doing your makeup. The product comes in two different sizes, 16oz and 32oz. The price may very depending on where you purchase the item and what size. I believe I paid about $8 for my 16oz bottle and it seriously still look brand new and I have had it for over 4 months.


Now onto the product itself. Lately I have been trying to get into more organic products for my face. I feel that organic products are better for our skin since we are avoiding any harsh chemicals and ingredients. With that said, yes, Dr. Bronner's Liquid Soap is organic! Win much?! It is made with no synthetic foaming agents, thickeners or preservatives. This is great to know because some foaming agents (like those found in many shampoos) are too harsh and can cause damage to the bristles (and if its a shampoo, your hair!). It is completely Biodegradable and vegetable-based, its made with Certified Fair Trade and Organic Oils, and it is multi-purpose! You can actually refill this bottle at your local Co-Op! Many many Co-Ops carry Dr. Bronner's and have refill stations for you to use. Not only is it cost effective but you are also technically recycling. What better thing than to have organic soap and save the planet at the same time!

The quality of this product is beyond amazing! You only need 2 to 3 little drops of this product into a container (any small Tupperware will do), fill it up with water (less than half way), and this is just enough to clean 12 brushes or more depending on how dirty your brushes are. The scent is not overpowering but not too subtle. You can definitely smell the lavender in the brush bristles. On top of that, the soap leaves my brushes squeaky clean and, if they are white bristles, it leaves them white and not stained. By stained I mean that sometimes we use that bright pink blush and the white bristles are stained pink, even after deep cleaning them. This soap cleans it all off and leaves the bristles like they were before using it, white.  

I really do love this product and I think it is by far my favorite deep cleaning brush cleaner. Before this  I use to use Sephora Brush Shampoo and although it had no harsh scent (or scent at all) it did take a ton of product to get a large powder brush clean and didn't completely take care of any stains left on the brushes from makeup. This product I just find to be very cost effective and it being multi purpose makes it even better. It being organic is like the cherry on top. This whole item is overall a win for me!

Thanks for reading my blog and I hope this is informative for you! I will soon do a tutorial on how I use this product to deep clean my brushes and how often you should clean your brushes to help keep them around longer. :)


RATING:
Packaging: 5/5
Product: 5/5
Quality: 5/5
Price: $8-$16 (Target. If you buy from the Co-Op I'm sure it may be more inexpensive.)
Would I buy again?: Most Defiantly
Overall: 5/5


**If you would like to read more about the ingrediants of Dr. Bronners Magic Soaps click here.**


Thursday, September 29, 2011

Wet 'n' Wild Color Icon Eyeshadow Collection Review~Comfort Zone

"Beauty is eternity gazing at itself in the mirror."~ Khalil Gibran 


So a couple of days ago I took a late night trip to my local Wal*Mart in search for something interesting and new. Like usual I made my way to the makeup section thinking maybe a new nail polish is what I needed. To my surprise I ended up leaving the store with a Wet 'n' Wild purchase. I picked up the Coloricon Eyeshadow collection in Petal Pusher. I have heard many great things about these palettes that I decided it was time for me to see what all the rave was about.


Comfort Zone is a palette with 8 Earth tone colors. This palette lives up to its name because all of these colors remind me of nice simple looks and staying within your comfort zone of either look or colors. It is perfect for a lunch date, work, or a just because moment. The eyeshadows are split into 2 categories with browbone, eyelid, crease, and definer stamped in them, which is clever. The two categories are split for daytime and nighttime looks. I may be wrong but that is how I interpret it. Now just because they are split into two different categories or have labels on them does not mean you cant mix and match colors and create your own unique look.


The shadows themselves are very pigmented and have amazing color payoff. A few of the colors in this palette are super soft, so if you are a beginner you may want to go very very lightly on this. A plus on some colors being soft is that it teaches you to build up the color versus putting way too much on at once. Like I mentioned before the color pay off of this palette is amazing and the fact that it will look good on any skin tone or with any eye color is a plus as well. My only minor complaint is that all the colors are shimmer and there are no matte tones. Which at the same time is okay because you can tone down all the shimmer with some matte blushes.


The picture above shows the first set of colors. The first color (left to right) is a nice beige color. It is very light so it works great as a browbone color or a color to place on the inner corner of the eye. Next you have a coppery peach tone. This is a very soft shade so you will want to build this one up a little at a time. The third color is a a light brown tone followed by a dark brown shade with red glitters in it. Gorgeous colors! 


Now onto the second set of colors. The first color is a nice shimmery taupe color. Following the shimmer taupe color is a very nice foresty green. I want to say that this green is one of my favorites from this palette. Next you have a black shadow with a lot of gold glitters. The last color is a very nice brown with red undertones. Its one of those colors that I find difficult to describe but none the less its gorgeous. 

For the swatches I only had to build up one color with is the beige tone from the first set. Other than that all the other colors were so pigmented only a swipe of my finger was needed to get the swatches. Now onto the packaging itself. The packaging is plastic, which is durable and not flimsy at all. Included with the eight shadows you get a double ended applicator. One end has a sponge tip and the other a brush. I feel this to be very worthless because I cant find any use for it to be honest. 

This specific palette to me is a great go to palette. I have nothing but good things to say about this palette and for the price its a steal!!!


RATING:
Packaging: 5/5
Product: 4/5
Quality: 5/5
Price: $4.69 (any drugstore :) )
Would I buy again?: Oh yes!!!
Overall: 4.9/5


Thursday, September 22, 2011

My Makeup and Nail Polish Storage Ideas & Inexpensive Alternatives

"Beneath the makeup and behind the smile I am just a girl who wishes for the world." ~Marilyn Monroe


If you are anything like me you love to purchase new makeup and nail polishes and well it gets to the point where you have no more space to put them in or have no idea how to organize them so it is much more simple to find them. Well thanks to my wonderful husband my organizing and storage problem have been fixed. Well at least for now, because I know my collection will continue to grow and grow. Pictures are posted as well to give a visual of how I am storing my stuff. 

Does it look familiar? If you have any man in your household I am pretty sure you have seen them store nuts, bolts, nails, and other small items in this bin. Well this bin works perfectly for storing and organizing makeup and more! It comes with 40 slots and at the very bottom it has a full length drawer. The price for this particular storage container is very cheap and reasonable. My husband purchased this from Harbor Freight Tools for less than the sale price (he works there and gets employee discounts).

I have my eyeliners, travel size items, extra makeup I have, concealers, and even earrings stored in it. Not only is this keeping all my makeup organized but it is taking up less space in our bedroom. I have a specific way of keeping my stuff organized. I started off with my earrings. I hardly buy earrings that dangle and when I do I am kind of stumped on how to keep them stored, specially if they are feather earrings. So the top 5 slots have dangling earrings in them. I made sure to keep the backs of the earrings sticking out so they would not tangle or ruin an earring. 


The next couple of rows are used for my lip glosses, lip balms and lipsticks. The lip glosses I decided to put together by color. Color coding them makes it easy for me to find what I am looking for. The lipsticks are together by brands. I tried doing it by color as well but found that they would not fit so brand was easiest. I make sure the label with the name of the lipstick is facing outward so that I can see what I am looking for easier. 


Next are face product which include extra foundations, primers, travel size face products, and concealers. These are organized by category. Primers are first, followed by foundation, then concealers. Pretty much how I apply my makeup daily. 


Eye products are next. My primers, e.l.f. quads, M.A.C. eyeshadows, and false lashes are all in the same row. I like to have small eyeshadows or individual ones in the slots because it makes it easier for me to find. Eyelashes are something I hardly use but when I do I like it to be easy to find them.  


Finally eyeliners. I have them color coded as well and separated into categories. Pencils are together by color and liquids and gels are together by color as well. 

In the bottom drawer I have my fingernail tools, lash glue, and loose pigments. Once again makes it super easy for me to find what I am looking for.


Now onto the nail polishes. The container above was initially meant to be for my polishes. However, keeping my polishes on their side causes the polish to leak into the cap which then makes it impossible to open. So I had some empty woven baskets from the dollar store laying around. I had initially purchased these to use for gifts for my business but since I never did use them I decided to use them for my polishes. Once again all my polishes are color coded. I love the baskets because not only were they inexpensive, they are colorful, fit about 20 polishes (depending on width of ea/one), and they are small. 


Now for very inexpensive storage containers that you can use are shoe boxes. Shoe boxes can store your polishes and makeup. They are very inexpensive and you are also recycling. They also help you save space because you  can stack them up on each other. You can decorate the box to look a lot more presentable and neat and even add a cute label so that finding that specific product can be easier. All you need is some fabric, ribbon, markers, or even stickers. You can make it your own style and save space and money while doing so. 

Hope this helps out. Storing cosmetics should be easy, fun, and inexpensive so I hope this really helps out with that. Hope you guys have a fabulous day!!!!


Tuesday, August 30, 2011

HOLY BROWS!!! Quick guide on how to shape your brows.

For me the greatest beauty always lies in the greatest clarity. ~ Gotthold Epharaim Lessing


I was never really intending on doing a post on eyebrows: the do and don'ts, the how to's, and the what to use. However, lately at work (I am a sales representative in a mall) I have been noticing the things people do to their eyebrows. Now this is not just women its men too. To be honest there is only so much eyebrow fails that I can take that I thought it would be a good idea to do this post so that others out there do no make the same mistake. So lets get this started!

Little Lesson on Eyebrows:
Before you start doing anything to them take a while and look at your eyebrows. Some people are lucky enough to where all their eyebrows need is a little bit of a clean up and they are set and others, like myself, are not so lucky. The thickness of your eyebrows are pretty much determined on your facial features and yourself.

   I would say to not do them any thicker than the Brooke Shields. (pic below)

And not any thinner than Gwen Stefani's eyebrows.

Tools To Shape Your Brows:
Some tools you may want to use or get to shape your eyebrows:
*Tweezers-to help pluck any unneeded hairs
*Mascara Wand- to have better control on your eyebrows
*Cosmetic Scissors-to cut any excess length

Beginning, Arch, and End:
To determine where they should begin, end, and arch is a very simple task. For this you may want to grab a pencil and maybe an eyeliner as well. Using the pencil place it besides your nostril, like shown in the picture below marked as "A". This right here will determine where the eyebrow will begin. To help you you can use the eyeliner and make a mark at this point. Next you will place your pencil at about a 45ยบ angle. It should be right on the corner of the pupil. This right here will be the highest point in your eyebrow, the arch ("B" in the picture). Once again feel free to make a mark as well. Finally "C". Align your pencil with the edge of your nose and the outer corner of your eye. This here will tell you where your eyebrow should end. Now with the end of your eyebrow ("C") make sure to not make it point downward. Keep this part high will give you a more awake and youthful look.
Like I had mentioned before you decide the thickness of your eyebrows. Do not make the space from the start of the eyebrow to the arch too thin. If anything all you have to do is clean up around the marks to give your eyebrows form. 

After placing your marking use the mascara wand to put the hairs into place. Using the tweezers pluck away any hairs that are unwanted. Do a little at a time. If you have an issue with the small amount of pain it costs you can grab a cotton ball and soak it with water and apply the water on the area being plucked. This will with the pain. Now if you want to trim the length from your eyebrows take the wand and brush the hairs upwards. Anything that goes past your defined eyebrow cut. Do a little at a time and be very careful. Last thing you want is to end up with a bald spot on your eyebrow. I would recommend trimming your eyebrows when no one is around so you can avoid any distractions that may cause a little problem. 

Defining the brows:
Now onto defining your eyebrows. If your brows are like mine you have certain areas in your brows that have a lot less hair than the rest of your brow. Defining and filling in the brow will not only give you a more complete look but give a little more focus to your face. Here are some of the tools you want to use for defining and filling in your brows.
*Eyebrow pencil or shadow-to fill in and define the brow
* Angled brush(for the shadow)-If using a shadow you want the angled brush to apply the shadow
*Brow Gel-Keep those brows in place
*Mascara Wand-Shape them into place. If you don't have one yet don't throw out the mascara wand from your empty mascara tube. Keep it and wash it. Its reusable :)

When filling in your brows you want to use the mascara wand to place them in shape. Next take your pencil or shadow and feather in the areas that are "bald". After feathering in those areas feel free to take your shadow or pencil and do a soft outline around your brows. If you feel that you made your brows a little too dark do not fuss. Take the wand and comb your brows out a little. This will help some of the color stick to the wand. If they are still too dark for you take a kabuki brush and brush your brows. Finally to keep them in place use the brow gel and do a coat over your brows. Its very easy to do and like I mention before makes your look be more complete and your eyes pop.

What NOT to do:

Chola brows: This is a big NO! For one they make her look angry all the time and they are too thin and dark.

Bushy and Uni brows: Not only is this unappealing but it does not accentuate her face at all.

Hockey brows: And yes I said hockey. Look that the shape. Its similar to the hockey stick. The arch is way to close to the beginning of the brow. They are way too thin for her face. They also make her look like she has a bigger forehead.

Another set of Chola Brows or Sharpie brows. They are way way too close together, uneven, too dark, and once again give the appearance of a big forehead. 

Smiley Face Brows: If you look at the brows alone they look like the eyes from a smiley face. They are not only uneven, have no real shape, too dark, and one is higher than the other.

Sperm brows: These are just a type of brows that I would recommend no one to do. They seriously look like sperm.

Finally the tattooed brows. Whether its a design like the one about or tattooing actual looking eyebrows dont. You are going to regret any type of eyebrow tattooing when you are 60 and have sagging skin and the grandchildren ask you what you were thinking.

Anyways these are just a couple of suggestions on how to shape and fill in your brows. There are many great products out there and services to help you achieve this if you do not want to do it at home. I personally love to save money so I pluck my eyebrows nearly everyday to keep them clean and I also decided to invest in a wax warmer and supplies so I can also wax them at home. Hope you guys enjoyed this blog. :)


Friday, August 26, 2011

Ulta Cosmetics Review

A witty woman is a treasure; a witty beauty is a power. ~ George Meredith

So I recently did an online purchase on the Ulta website. I had gotten an email on a deal they had at the moment. If you have an Ulta membership card and get/read their emails you probably remember this deal. The deal was to purchase $17.50 in Ulta brand makeup and you received a free makeup bag of your choice with 17 pieces of Ulta cosmetics. I have never tried on the Ulta brand makeup since we recently got an Ulta in our town so this to me seemed like a great deal and opportunity. An opportunity to try more than one Ulta brand cosmetic. 

For this being my first online purchase from Ulta I was very impressed. Not only with the cosmetics but with the shipping time. Whenever I purchase anything from Sephora online it take over a week to get here since I live close to Montana. However with the Ulta purchase it was here in a little less than a week. I was really impressed with that. Now onto what I purchased and my free items.

Like I had mentioned before, in order to get the free makeup bag I had to purchase $17.50 in Ulta brand cosmetics so I decided that I really wanted to try out their blushes. Most of the blushes I own have some shimmer to them and I was really wanting to get some that were matte. I was also wanting to get a lipstick in a bright color. Below are the 3 blushes I purchased and the bigger one is one of the free products that came in my makeup bag. On the top left there is Girlie and right besides it is Sweet Cheeks. The bottom left is the free blush or Cheek Color in Afternoon Delight and right besides it Afterglow. 

Now just looking at the blushes in the picture you can tell that some have shimmer in them. Mind you I was in search of matte blushes. Well to my discovery when my order arrived only one blush was matte, Girlie. I decided to keep them anyways because the colors were really nice. I must say that the online pictures do not do them justice.
The picture above is a little swatch of the blushes. From left to right we have the free blush Afternoon Delight, Girlie, Afterglow, and Sweet Cheeks. Now onto my review and lets start with the free blush I got. Afternoon Delight is a very creamy and shimmery peach color. This I found perfect to use as a highlight for the cheeks or to put in the inner corner of your eye to give it a nice pop of color. It is a very pigmented color so I usually apply it with my finger. 
Girlie is a nice matte pink tone. This particular blush is not extremely pigmented but it still gives that nice summer glow. I do get a slight smell and it smells very powdery but it is not powdery at all. 
Afterglow is one of my favorite blushes from the four that I have been using this almost every single day. Once again it is a pink tone but it is darker and has shimmer. This is more pigmented than Girlie and the shimmer is subtle  This is a very good color that would look good on any skin tone. 
Sweet Cheeks is a shimmer dark pink blush. This one I like to use whenever I want to get a natural glow. It is summer time and I did get really really dark so this is the closest to a summer glow color that I could find. 
Overall the colors are amazing but do not let the online color fool you. Online it lacks the description so you are not sure if what you are purchasing is a matte or shimmery blush. I would recommend to go into the store and look at them first. I still like these colors regardless of the matte or shimmer finish.

Now onto the lipsticks. I purchased on and the other one was a free lipstick that came in the makeup bag. 
The lipstick on the left was the free one in Iced Cappuccino. The one on the right is the lipstick I purchased in Fuchsia Fever. I did swatches on the white paper but here are the swatches on my skin.
Starting with Fuchsia Fever. This color is a bight deep pinkish red color. It is so smooth and glides on so easily. It also has a subtle smell of fruit in my opinion. Although it glides on so easy it rubs off as easy too. I don't really mind that because it is so smooth when you apply it. Now the Iced Cappuccino is also a color that glides on easily and looks great on any skin tone just like the Fuchsia Fever. The Iced Cappuccino does have a subtle smell that is not pleasant. I cannot describe the smell but I don't like it at all. Other than that I cant complain much because it was a free lipstick and no one can argue with free, right? 

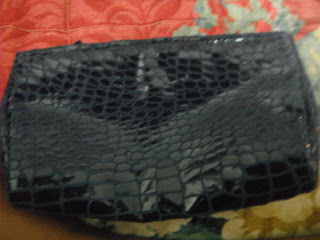
The free makeup bag came in three different colors that you could pick from. There was True Blue, Natural Wonder, and Wild Side. Once again if you got in on this deal you will probably recognize the lip stick to come from the True Blue collection.  
I think the makeup bag can double as a clutch too but its all up to you.

Now onto the eyeshadows. The free 17 piece bag comes with 2 quads. Depending on what bag you choose you get a certain color of eyeshadows. 
This is one of the quads that came with the bag. Starting once again with the top two from left to right its Polished & Black Ink. Right underneath them from left to right is Truffle and Smoke. Now one thing that I noticed from both quads is that the names on the back of them are switched around. I actually had to go online to find out which name went to which color. 
As you can tell from the swatch these colors are all shimmer colors and very very well pigmented. I did find one small problem with it they are just slightly hard to blend. It took me twice as long to blend the colors but they look great on. This quad is perfect for a smokey eye. It consists of manly browns with the one black shimmer color. 

The second quad I received is also a great quad for a blue smokey eye. 
From the top row left to right there is Moonbeam & Sapphire. Underneath them from left to right there is Silk & Peacock. Both quads come with the sponge tip applicators brush and a really small mirror. 
These set of colors are extremely pigmented and creamy. They are shimmery as well and combined make a perfect night time smokey eye. I have nothing bad to say about their eyeshadows and I am looking forward to trying more out and maybe matte eyeshadows from them. 

Also for free a dual ended eye liner with Black on one side and Indigo on the other. 
These are extremely smooth and glide on easily however I do not feel like they are quite as pigmented and don't have quite as much staying power as my other eyeliners but these do work okay.

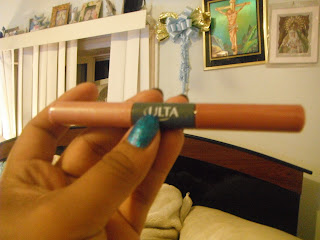
Along with the dual ended eye liner it came with another dual ended lip & eye liner in the color Mink and Deep Brown.
Mink is a nice red brown color and dark brown is well dark brown. They also glide on easily and are pigmented.
In the picture above from left to right we have black, indigo, mink, and dark brown.

There was a dual ended lip gloss in Lovely and Princess.
Princess is the color on the left and it is a sheer pink color. The one on the right is Lovely which is a nice brown color. I found these lip glosses to work well and not be sticky at all. These can be worn alone or on top of lip stick to give it a nice shimmer and pop. Personally I love to wear both of the colors alone.

Also included in the makeup bag was a small fingernail polish. Its in the color Diva.
This color is very very sheer and has a subtle subtle hint of glitter. Looking at the bottle it is a pink color with tons of glitter, but like I said before, once you apply it you can see it is very very sheer. You do get a subtle hint of pink and glitter when the light hits it just right. I found this perfect if you want to do a french manicure and have the all over nail color be glittery. I used this on my goddaughter and she absolutely loved it! 

I also received a a free mascara and 3 free brushes. The mascara is in Jet Black and its their Lash Blow Out. I have not yet used the mascara so I can not give a full on review of it yet.
 The three piece brush set is an angled blush brush, a sponge tip applicator brush, and an eyeshadow brush.
These brushes are okay. The angled blush brush does shed a bit and its not the best out there but once again for free I can not complain. I do use it a lot for applying my blush. The sponge tip applicator I have not used at all. The only use I have for them is to pack on color. The eyeshadow brush is not bad. I have mostly used this to apply  loose pigments and glitter since I noticed it does not do so well with eyeshadows. 

Over all I am content with my purchase and would recommend almost everything to my friends and family.I am looking forward to purchasing more Ulta brand cosmetics and writing more reviews on them since I noticed that when I myself was looking for Ulta brand cosmetic reviews I only found a few. Hope this is helpful to all of you. More reviews to come soon :)

Price List:
*Ulta Cheek Color (Afterglow, Girlie, Sweet Cheeks) $7.00 (Ulta)
*Ulta Lipstick (Fuchsia Fever): $8.00 (Ulta)
*Ulta Eyeshadows-(These are not sold in quads but individual full size) $7.00 (Ulta)
*Ulta Lash Blow Out Mascara: $10.00 (Ulta)
*Lip liner & eye liner sold individually and full sized: $8.00 each (Ulta)